
Microsoft Teams is a lot of things. It’s a video conferencing tool, a team messaging channel, and a tool for in-app co-authoring, just to name a few. During the pandemic, the popularity of Teams skyrocketed.
User numbers for MS Teams jumped from 20 million in November 2019 to 75 million in April 2020. As of this year, Microsoft reports a user count of 270 million for the platform. This makes it the most popular business tool for team communications.
But one of the things that makes the app popular is also one that can make the setup complex. Microsoft Teams has many moving parts, but to use them effectively they need to be well organized. Additionally, users need to have a chance to learn the system and train on best practices.
First, let’s look at the different areas of Microsoft Teams and what it can do. Then, we’ll give you a simple setup checklist to help your team get up and running productively.
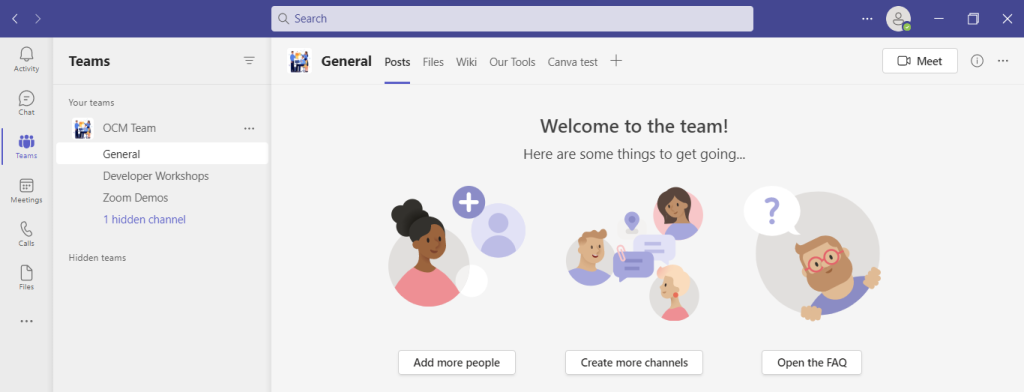
You can think of Teams as a virtual office in the cloud. It’s a centralized hub where teams can communicate, collaborate, and manage tasks. There is also an external communication component to Teams. You can use the app to video conference with anyone. You can also invite guests to a chat channel.
Here are some of the features of MS Teams:

Some good news for small businesses is that there is a free version of Microsoft Teams. If you sign up for a Microsoft 365 business plan, you get the app included, but with a few more features.
Microsoft has also been pushing MS Teams for personal use. So, you can use it to keep your departments better coordinated at work. Or to manage family video calls or PTA meeting collaboration. It’s a versatile and scalable virtual office platform.
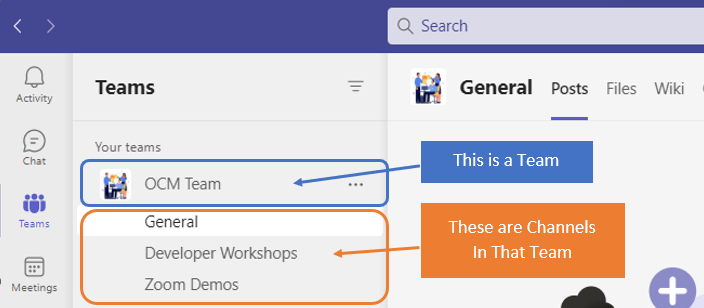
One of the advantages of Teams is that it allows you to set up specific areas for your groups to collaborate. You do not want everyone to set these teams up on their own, or you could end up with an unorganized mess.
Some ideas for setting these up:
Typically, if you mirror the hierarchy of your organization, that’s a good place to start. Team areas are secured so only those users invited can see or access any of the content in that team.

For each team, add the members allowed to take part in that team. These would be people that can see the resources posted in that team area. It would normally be the members of the department or group that the team is designed for.
The next level beneath the Team is the Channels. These team channels help organize conversations. For example, within a team set up for your marketing department, you may decide to add three channels. This keeps conversations more focused and makes it easier to find things.
For instance, you could have channels for:
Team channels are another area that you want to control. Don’t let everyone set up channels without a plan, otherwise, things get messy fast.
Tabs are a great way to foster productivity. Say that employees on your accounting team need to access a tax reporting website. Inevitably, there can be time wasted asking for that link or a login. This is especially true if someone is filling in for a co-worker.

You can add that website link and info to the Tabs area at the top of the team channels. Just click the plus sign to add a new resource and consolidate things for your team members.
One of the reasons that company initiatives fail is that users weren’t properly enabled. If users aren’t trained on using MS Teams, then they’ll revert to using whatever they used before. This negates the benefits of moving to Teams when not everyone is onboard.
Work with a Microsoft professional to train your teams. We can provide tips on the most productive features. As well as short-cut their learning curve quite a bit! Make sure to have a realistic timeframe. You should also survey users on whether they feel they need more training.
We can help you over many of the roadblocks that organizations face when starting with Teams. Contact us today for a free consultation to enhance your collaboration and productivity.
This Article has been Republished with Permission from The Technology Press.